Warning: When on campus, you must use the DePauwSecure wireless connection to install and use the virtual desktop client.
- Browse to http://desktops.depauw.edu
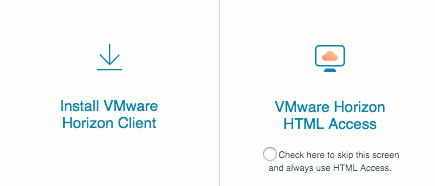
- Click Install VMware Horizon Client

- In the next window, scroll down to the VMware Horizon Client for Mac, and then click Go to Downloads
- In the next window, click Download
- After the VMware Horizon View Client . . .dmg downloads to your Downloads folder, double-click on it

- In the license agreement window, click Agree after reading or printing the agreement
- If the VMware Horizon View Client icon displays, double-click on it. If it does not display, it opened automatically.

- Drag the VMware Horizon Client.app to the Applications folder

- Browse to the Applications folder, double-click VMware Horizon View Client.app (Note: You may also want to drag the application icon onto your dock.)
- If the message “VMware Horizon Client.app is an application downloaded from the Internet. Are you sure you want to open it?” displays, click Open
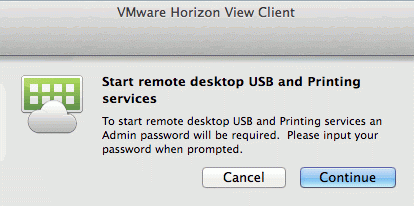
- If the window Start remote desktop USB and Printing services” displays, click Continue, and then enter the username and password you use to login to your computer

- If a window to add the connection server does not open in the VMware Horizon Client window, click + (i.e., Plus), which is found in the upper left corner
- In the Add Connection Server window, for Server name type in “desktops.depauw.edu” (without the quotes), and then click Continue (Warning: Make sure the checkbox next to Always Connect at Launch is unchecked or you may have problems later on trying to login.)

- Log in with your DePauw Account (i.e. e-Services) username and password

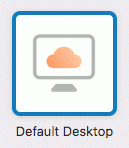
- Start the desktop by clicking on the image of a computer monitor (Note: You may first need to click on the desktops.depauw.edu icon in the VMware Horizon Client window and login.)

- Windows will open (NOTE: Be Patient! It may take several seconds (or as even as long as 2-3 minutes) for the desktop to load. Once it is loaded and you see a Windows Desktop, it will run much faster and you can use Chrome to access Google, e-Services, Moodle, and other online resources. You can also run other applications available in the system (e.g., Word, PowerPoint, etc.).
- Important: You should save your work on a flash drive, University network drive, or in the Cloud; otherwise, all work saved to the desktop will be erased upon reboot.

- Either go to the task bar and click on the icon of the program you would like to use or click Start to open the All Programs window for a list of other options. When you are finished using the virtual desktop, click Start → Log off.

- Due to a limited number of seats for accessing the virtual desktop, please log off if you will not be using the application after 15-30 minutes.
- When you want to use the program, repeat step #9 above to log in.
Updated: 3/5/2021
